Chapter 5
What is a sprite? How do I use them?
Magical Fairies?
No, sprites are not magical fairies. It is a term in 2D graphics programming which refers to an image or animation. The Nintendo DS has dedicated hardware for dealing with sprites. This makes the system very useful for 2D. Most gaming systems do not have a 2D core, and all sprites and other 2D graphics have to be handled manually by painting 2D images on the side of a quad within 3D space.
The OAM
The OAM manages all the sprites. This is an immense job, most of it done behind
the scenes for us. After using it, you might think it magical. It's not as
magical as it seems, however. OAM stands for Object Attribute Memory. It is the
place in memory we use to keep track of and control our sprites. The OAM works
with a SpriteEntry and a SpriteRotation struct to manage the attributes of
our sprites.
Information About the Sprite Hardware
On the Nintendo DS, we can have up to 128 sprites. Only 32 of those sprites can be affine transformed (rotated, scaled, skewed, etc.). We are also only allowed to address 1024 different tiles to comprise all of our sprites, per engine. Sprites can be made of tiles that use 16 colors or of ones that use 256 colors. Tiles that use 256 colors are twice as large as tiles that use only 16 colors. Another advantage of using 16-color sprites is the ability to use 16 different palettes. When using 256-color sprites, each sprite (and tile) must use the same palette. When using 16-color sprites, we can have one sprite use one 16-color palette and another sprite use a different 16-color palette, even though both use the same tile data. Games often use this trick to make different colored enemies that look the same. The sprites still use the same tile data, but they use different palettes.
How Sprites are Stored in Memory
Sprites are broken into 8x8 pixel pieces. This is called tiling. When drawn to screen, the hardware pieces these tiles together, like a puzzle where the pieces have no distinguishing edges. There are two ways to tile sprites, 1D and 2D. In a 2D layout, the sprite memory is treated like a giant image from which sprite tiles are obtained by making a box the size of the sprite and placing it over the giant image. In a 1D layout, the sprites are laid out in a linear fashion, as discussed in Figure 5.1.
The conversion process is very similar to that for backgrounds. We simple make
grit rule files that tell grit how we want our images converted, and it
generates a .o and a header file for us. The grit rule files and image files go
into the same place as background images, the gfx folder.
Figure 5.1. The upper text shows information as it would be on a non-tiled background. The lower text shows the same data, tiled, for use in tiled graphic modes.
const u16 data[] = {


0x0000, 0x0000, 0x0000, 0x0000, 0x0000, 0x0000, 0x0000, 0x0000,


0x0F0F, 0x0F0F, 0x0F0F, 0x0F0F, 0x0F0F, 0x0F0F, 0x0F0F, 0x0F0F,


0x2020, 0x2020, 0x2020, 0x2020, 0x2020, 0x2020, 0x2020, 0x2020,


0x2F2F, 0x2F2F, 0x2F2F, 0x2F2F, 0x2F2F, 0x2F2F, 0x2F2F, 0x2F2F,


0x4040, 0x4040, 0x4040, 0x4040, 0x4040, 0x4040, 0x4040, 0x4040,


0x4F4F, 0x4F4F, 0x4F4F, 0x4F4F, 0x4F4F, 0x4F4F, 0x4F4F, 0x4F4F,


0x6060, 0x6060, 0x6060, 0x6060, 0x6060, 0x6060, 0x6060, 0x6060,


0x6F6F, 0x6F6F, 0x6F6F, 0x6F6F, 0x6F6F, 0x6F6F, 0x6F6F, 0x6F6F,


0x8080, 0x8080, 0x8080, 0x8080, 0x8080, 0x8080, 0x8080, 0x8080,


0x8F8F, 0x8F8F, 0x8F8F, 0x8F8F, 0x8F8F, 0x8F8F, 0x8F8F, 0x8F8F,


0xA0A0, 0xA0A0, 0xA0A0, 0xA0A0, 0xA0A0, 0xA0A0, 0xA0A0, 0xA0A0,


0xAFAF, 0xAFAF, 0xAFAF, 0xAFAF, 0xAFAF, 0xAFAF, 0xAFAF, 0xAFAF,


0xC0C0, 0xC0C0, 0xC0C0, 0xC0C0, 0xC0C0, 0xC0C0, 0xC0C0, 0xC0C0,


0xCFCF, 0xCFCF, 0xCFCF, 0xCFCF, 0xCFCF, 0xCFCF, 0xCFCF, 0xCFCF,


0xE0E0, 0xE0E0, 0xE0E0, 0xE0E0, 0xE0E0, 0xE0E0, 0xE0E0, 0xE0E0,


0xEFEF, 0xEFEF, 0xEFEF, 0xEFEF, 0xEFEF, 0xEFEF, 0xEFEF, 0xEFEF};
const u16 data[] = {


0x0000, 0x0000, 0x0000, 0x0000, 0x0F0F, 0x0F0F, 0x0F0F, 0x0F0F,


0x2020, 0x2020, 0x2020, 0x2020, 0x2F2F, 0x2F2F, 0x2F2F, 0x2F2F,


0x4040, 0x4040, 0x4040, 0x4040, 0x4F4F, 0x4F4F, 0x4F4F, 0x4F4F,


0x6060, 0x6060, 0x6060, 0x6060, 0x6F6F, 0x6F6F, 0x6F6F, 0x6F6F,


0x0000, 0x0000, 0x0000, 0x0000, 0x0F0F, 0x0F0F, 0x0F0F, 0x0F0F,


0x2020, 0x2020, 0x2020, 0x2020, 0x2F2F, 0x2F2F, 0x2F2F, 0x2F2F,


0x4040, 0x4040, 0x4040, 0x4040, 0x4F4F, 0x4F4F, 0x4F4F, 0x4F4F,


0x6060, 0x6060, 0x6060, 0x6060, 0x6F6F, 0x6F6F, 0x6F6F, 0x6F6F,


0x8080, 0x8080, 0x8080, 0x8080, 0x8F8F, 0x8F8F, 0x8F8F, 0x8F8F,


0xA0A0, 0xA0A0, 0xA0A0, 0xA0A0, 0xAFAF, 0xAFAF, 0xAFAF, 0xAFAF,


0xC0C0, 0xC0C0, 0xC0C0, 0xC0C0, 0xCFCF, 0xCFCF, 0xCFCF, 0xCFCF,


0xE0E0, 0xE0E0, 0xE0E0, 0xE0E0, 0xEFEF, 0xEFEF, 0xEFEF, 0xEFEF,


0x8080, 0x8080, 0x8080, 0x8080, 0x8F8F, 0x8F8F, 0x8F8F, 0x8F8F,


0xA0A0, 0xA0A0, 0xA0A0, 0xA0A0, 0xAFAF, 0xAFAF, 0xAFAF, 0xAFAF,


0xC0C0, 0xC0C0, 0xC0C0, 0xC0C0, 0xCFCF, 0xCFCF, 0xCFCF, 0xCFCF,


0xE0E0, 0xE0E0, 0xE0E0, 0xE0E0, 0xEFEF, 0xEFEF, 0xEFEF, 0xEFEF};
Sprite Attributes
Sprites have three attribute variables associated with them. With them, sprites
can spin and flip and mosaic and perform all sorts of fun hardware effects.
Each attribute is multi-purpose and requires some amount of bit twiddling and
masking to achieve the affects we want. That is, it would if it weren't for
this nice SpriteEntry union which libnds provides for us. In most cases, we
will use this union to do what we'd like to with our sprites, but there are
special cases where this is not possible.
We will cover how to update, initialize, and rotate using bit twiddling methods, as libnds doesn't yet provide ways of doing this otherwise. libnds provides the means to do other things that we'll be doing with sprites though, like move them, we'll be doing. We'll use the libnds API wherever possible. Let's write some functions to do each of those, in that order.
I provide you with a header file, located with the accompanying source at
code/chapter_5-sprites/include/sprites.h that contains a collection of sprite
related function declarations. We'll be working on the definitions for each of
these functions together in a new file called sprites.cpp. Our first step
will be to create a that new source code file. Put a new file called
sprites.cpp into the source folder of your project directory.
Updating the OAM
Instead of keeping track of things directly in the OAM, we'll manage a copy of
the OAM in memory that we will copy over every frame using updateOAM(). The
reason we do this is because writes to OAM are locked during all times but
during VBlank. We will wait for VBlank to occur before copying our copy of the
OAM into the actually OAM.
Updating the OAM is very straightforward. We do this by copying our copy of the
OAM to the real OAM. Our copy of the OAM might still be stuck in the cache and
may not have made it into main memory yet, so we first flush the source buffer
in local memory (a must whenever performing a DMA operation) to ensure that the
values in cache are saved to RAM and DMA sees the correct data. The data we want
to copy might be stuck in cache still and may not have made it into main memory
yet. Then, we tell the OAM to look into the OAMTable instance we will create
later for information about each one of our sprites.
void updateOAM(OAMTable *oam) {
  DC_FlushAll();
  dmaCopyHalfWords(SPRITE_DMA_CHANNEL, oam->oamBuffer, OAM,
                   SPRITE_COUNT * sizeof(SpriteEntry));
}
Initializing the OAM
The first thing we do when initializing the OAM is to clear all the sprite data
in the OAM. After that, we'll make a call to our afore written updateOAM()
function.
void iniOAMTable(OAMTable *oam) {
  /*
   * For all 128 sprites on the DS, disable and clear any attributes they
   * might have. This prevents any garbage from being displayed and gives
   * us a clean slate to work with.
   */
  for (int i = 0; i < SPRITE_COUNT; i++) {
    oam->oamBuffer[i].attribute[0] = ATTR0_DISABLED;
    oam->oamBuffer[i].attribute[1] = 0;
    oam->oamBuffer[i].attribute[2] = 0;
  }
  for (int i = 0; i < MATRIX_COUNT; i++) {
    /* If you look carefully, you'll see this is that affine trasformation
     * matrix again. We initialize it to the identity matrix, as we did
     * with backgrounds
     */
    oam->matrixBuffer[i].hdx = 1 << 8;
    oam->matrixBuffer[i].hdy = 0;
    oam->matrixBuffer[i].vdx = 0;
    oam->matrixBuffer[i].vdy = 1 << 8;
  }
  updateOAM(oam);
}
Rotating Sprites
Let's get to spinning. This is a bit more difficult than what we've done before, but still fun. It's nice to not have to make a separate sprite for each rotation position the sprite will be presented in. However, doing so may be necessary for some applications as the Nintendo DS rotation won't always look as pretty as if the rotations had been done elsewhere.
The libnds's sin and cos lookup tables employ a 32768 degree system. Humans usually use a 360 degree system or radians. The angle we'll work with in this function will be one that is part of the 32768 degree system. You'll have to convert your radians or weird 360 degree value (Seriously, why 360? Silly Babylonians.) to the 32768 degree system before using this function in order to see the results you are expecting.
We have to use a transformation derived from our time spent playing with an affine transformation matrix. The sprite's affine transformation matrix is used slightly differently from the background affine transformation matrix. If you have a background in linear algebra, I'd recommend reading up on this portion of the hardware at https://gbadev.net/tonc/affine.html.
Figure 5.2. libnds Affine Sprite API
\begin{bmatrix}HDX & HDY\\VDX & VDY\end{bmatrix}
void rotateSprite(SpriteRotation *spriteRotation, int angle) {
  s16 s = sinLerp(angle) >> 4;
  s16 c = cosLerp(angle) >> 4;

  spriteRotation->hdx = c;
  spriteRotation->hdy = s;
  spriteRotation->vdx = -s;
  spriteRotation->vdy = c;
}
Showing and Hiding Sprites
Up until now, we haven't used the fancy SpriteEntry union included in libnds.
It allows us to avoid thinking about bit twiddling and masking in most cases.
In the case of showing and hiding sprites, we still need to be thinking about
these bits due to an oddity in the Nintendo DS hardware: the hiding bit of a
sprite (bit 9 of sprite attribute 0) is also the double bound bit of a sprite
if the sprite is an affine sprite (bit 8 of sprite attribute 0). Follow along
with the comments and code as we formulate a solution to writing a function
which shows and hides all kinds of sprites.
void setSpriteVisibility(SpriteEntry *spriteEntry, bool hidden, bool affine,
                         bool doubleBound) {
  if (hidden) {
    /*
     * Make the sprite invisible.
     *
     * An affine sprite cannot be hidden. We have to turn it into a
     * non-affine sprite before we can hide it. To hide any sprite, we must
     * set bit 8 and clear bit 9. For non-affine sprites, this is a bit
     * redundant, but it is faster than a branch to just set it regardless
     * of whether or not it is already set.
     */
    spriteEntry->isRotateScale = false;  // Bit 9 off
    spriteEntry->isHidden = true;        // Bit 8 on
  } else {
    /* Make the sprite visible.*/
    if (affine) {
      /* Again, keep in mind that affine sprites cannot be hidden, so
       * enabling affine is enough to show the sprite again. We also need
       * to allow the user to get the double bound flag in the sprite
       * attribute. If we did not, then our sprite hiding function would
       * not be able to properly hide and restore double bound sprites.
       * We enable bit 9 here because we want an affine sprite.
       */
      spriteEntry->isRotateScale = true;

      /* The double bound flag only acts as the double bound flag when
       * the sprite is an affine sprite. At all other times, it acts as
       * the sprite invisibility flag. We only enable bit 8 here if we want
       * a double bound sprite. */
      spriteEntry->isSizeDouble = doubleBound;
    } else {
      /* Bit 9 (the affine flag) will already be off here, so we don't
       * need to clear it. However, bit 8 (the sprite invisibility flag)
       * will need to be cleared. */
      spriteEntry->isHidden = false;
    }
  }
}
Moving Sprites
Now for some real fun. Moving sprites in hardware, and not having to worry
about clipping, buffers, or anything, is such a wonderful feeling. To move a
sprite, we simply change the SpriteEntry properties x and y. This is a
case where we don't have to think much about the underlying arrangement of this
information. The libnds union SpriteEntry describes the organization of data
to the compiler for us and the compiler then figures out the best way to
operate on that data; the compiler does the bit twiddling and masking for us.
Since this is so simple, we don't even need to write a function to do it for
us. So just take note of what we do here and remember it for later; you don't
have to write a function for it, but if you want to I'd recommend making it an
inline function.
  /* This is what we'd do if we wanted to move a sprite. */
  spriteEntry->x = 0;
  spriteEntry->y = 0;
Setting Sprite Priorities
The ability to set a sprites priority is essential when dealing with multiple sprites, as we will be doing. As such, we'll now discuss sprite priorities and how to set them.
A sprite, like a background, has a priority which determines how the sprite will appear with respect to other sprites and to backgrounds. A sprite with the same number priority as a background will appear above it. A sprite with a lower priority number than another sprite will appear above that other sprite. There are four priorities per graphics engine available for sprites, similar to background priorities.
To set the sprite priority, we'll simply set the SpriteEntry property
priority to one of four different values, depending on which priority we wish
to assign: OBJPRIORITY_0, OBJPRIORITY_1, OBJPRIORITY_2, or
OBJPRIORITY_3. The following code listing shows an example of what this looks
like.
spriteEntry->priority = OBJPRIORITY_3;
Using the Sprites
Now that our sprites.cpp file is finished, let's get on to how sprites are
stored in memory, how to load them, and so forth. So put away your sprites.cpp
file into the source directory of your home folder and let's get back into our
main.cpp file.
Setting up VRAM for Sprites
We'll need to make a place for our sprite data to live in VRAM. Since we will be using sprites on the main graphics engine, we can use VRAM bank E for our sprites. VRAM bank E is smaller than the other VRAM banks we've dealt with so far, as it is only 64 KB in size. However, this is more than enough to store 1024 unique 16-color tiles.
In our initVideo(), we need to map VRAM bank E for use with sprites on the
main graphics engine. Then, we need to tell the main engine to enable sprites
of the tiling style we want. We will use 1D tiled sprites. The resulting
initVideo function, post-modifications, is presented below .
void initVideo() {
  /*
   *  Map VRAM to display a background on the main and sub screens.
   *
   *  The vramSetPrimaryBanks function takes four arguments, one for each of
   *  the major VRAM banks. We can use it as shorthand for assigning values to
   *  each of the VRAM bank's control registers.
   *
   *  We map banks A and B to main screen  background memory. This gives us
   *  256KB, which is a healthy amount for 16-bit graphics.
   *
   *  We map bank C to sub screen background memory.
   *
   *  We map bank D to LCD. This setting is generally used for when we aren't
   *  using a particular bank.
   *
   *  We map bank E to main screen sprite memory (aka object memory).
   */
  vramSetPrimaryBanks(VRAM_A_MAIN_BG_0x06000000, VRAM_B_MAIN_BG_0x06020000,
                      VRAM_C_SUB_BG_0x06200000, VRAM_D_LCD);

  vramSetBankE(VRAM_E_MAIN_SPRITE);

  /*  Set the video mode on the main screen. */
  videoSetMode(MODE_5_2D |           // Set the graphics mode to Mode 5
               DISPLAY_BG2_ACTIVE |  // Enable BG2 for display
               DISPLAY_BG3_ACTIVE |  // Enable BG3 for display
               DISPLAY_SPR_ACTIVE |  // Enable sprites for display
               DISPLAY_SPR_1D        // Enable 1D tiled sprites
  );

  /*  Set the video mode on the sub screen. */
  videoSetModeSub(MODE_5_2D |           // Set the graphics mode to Mode 5
                  DISPLAY_BG3_ACTIVE);  // Enable BG3 for display
}
Sprite Tile Addressing
We'll be using the same memory alignment (boundary) as the GBA uses for our
sprites. Tile VRAM addresses must be aligned to 32 bytes. If you feel shorted
by this, since you can't use all 1024 addressable tiles when using 256 color
tiles, for instance, then you can look up how to use other alignments at
https://problemkaputt.de/gbatek.htm#dsvideoobjs. You'll have to set
REG_DISPCNT (via videoSetMode()) with a value defined in
libnds/include/nds/arm9/video.h akin to DISPLAY_SPR_1D_SIZE_XXX (the
default, and the method the GBA and we use, is DISPLAY_SPR_1D_SIZE_32).
To compute the address to copy tiles to, we basically need to know two things:
the memory alignment we are using and the tile numbers we want to assign data
to. Using the formula from Martin Korth's GBATEK, "TileVramAddress =
TileNumber * BoundaryValue", and libnds's SPRITE_GFX define we can compute
the address of any tile as follows.
  static const int BOUNDARY_VALUE = 32; /* This is the default boundary value
                                         * (can be set in REG_DISPCNT) */
  static const int OFFSET_MULTIPLIER = BOUNDARY_VALUE / sizeof(SPRITE_GFX[0]);
  uint16 *tileVramAddress = &SPRITE_GFX[shuttle->gfxIndex * OFFSET_MULTIPLIER];
We usually want to copy more than one tile into VRAM at a time, however.
Luckily, when converting images to sprites with grit, it will tell us the
length in bytes of our tile data for that sprite. After we have the length in
bytes, we can use dmaCopyHalfwords() (which uses byte lengths for copying) to
copy the tile data into VRAM. We can also calculate how many tiles an image
uses from its length in bytes by diving the length in bytes by how many bytes a
tile takes up. In our case, as we'll be using 16-color tiles, a tile (8x8
pixels) takes up 32 bytes.
Loading in a Sprite
Now, to see a sprite in action. Let's load in the orangeShuttle graphic and
the moon graphic. Make a new function called initSprites(). Place it after
the initBackgrounds() function. Make sure to include orangeShuttle.h and
moon.h now. They contain information about our sprites as generated by grit.
I've also create a new struct type called SpriteInfo. This struct contains
information about sprites that aren't explicitly contained in the SpriteEntry
struct. We'll be using it to help us manage our information about sprites
better.
Procedure 5.1. To Create a Sprite
- We'll begin by filling in our
SpriteInfostruct for the sprite. Each sprite will have its ownSpriteInfostruct. The first thing we need to do is assign an OAM ID to the sprite. This number will help us keep track of which OAM entry our sprite is associated with. We'll also use it to compute other offsets, although we don't have to use it for that purpose in many cases. - Assign the width, height, and angle of the sprite.
- Select an OAM entry to associate with this sprite.
- Configure attribute 0.
- Configure attribute 1.
- Configure attribute 2.
- Copy tile data to VRAM.
- Copy the palette data to VRAM.
We'll just follow these steps twice when writing the initSprites() function
for our sprites. You can follow along with the comments and the code below.
void initSprites(OAMTable *oam, SpriteInfo *spriteInfo) {
  /*  Define some sprite configuration specific constants.
   *
   *  We will use these to compute the proper index into memory for certain
   *  tiles or palettes.
   *
   *  OFFSET_MULTIPLIER is calculated based on the following formula from
   *  GBATEK (https://problemkaputt.de/gbatek.htm#dsvideoobjs):
   *    TileVramAddress = TileNumber * BoundaryValue
   *  Since SPRITE_GFX is a uint16*, the compiler will increment the address
   *  it points to by 2 for each change in 1 of the array index into
   *  SPRITE_GFX. (The compiler does pointer arithmetic.)
   */
  static const int BYTES_PER_16_COLOR_TILE = 32;
  static const int COLORS_PER_PALETTE = 16;
  static const int BOUNDARY_VALUE = 32; /* This is the default boundary value
                                         * (can be set in REG_DISPCNT) */
  static const int OFFSET_MULTIPLIER = BOUNDARY_VALUE / sizeof(SPRITE_GFX[0]);

  /* Keep track of the available tiles */
  int nextAvailableTileIdx = 0;

  /* Create the ship sprite. */
  static const int SHUTTLE_OAM_ID = 0;
  assert(SHUTTLE_OAM_ID < SPRITE_COUNT);
  SpriteInfo *shuttleInfo = &spriteInfo[SHUTTLE_OAM_ID];
  SpriteEntry *shuttle = &oam->oamBuffer[SHUTTLE_OAM_ID];

  /* Initialize shuttleInfo */
  shuttleInfo->oamId = SHUTTLE_OAM_ID;
  shuttleInfo->width = 64;
  shuttleInfo->height = 64;
  shuttleInfo->angle = 462;
  shuttleInfo->entry = shuttle;

  /*
   *  Configure attribute 0.
   *
   *  OBJCOLOR_16 will make a 16-color sprite. We specify that we want an
   *  affine sprite (via isRotateScale) here because we would like to rotate
   *  the ship.
   */
  shuttle->y = SCREEN_HEIGHT / 2 - shuttleInfo->height;
  shuttle->isRotateScale = true;
  /* This assert is a check to see a matrix is available to store the affine
   * transformation matrix for this sprite. Of course, you don't have to have
   * the matrix id match the affine id, but if you do make them match, this
   * assert can be helpful. */
  assert(!shuttle->isRotateScale || (shuttleInfo->oamId < MATRIX_COUNT));
  shuttle->isSizeDouble = false;
  shuttle->blendMode = OBJMODE_NORMAL;
  shuttle->isMosaic = false;
  shuttle->colorMode = OBJCOLOR_16;
  shuttle->shape = OBJSHAPE_SQUARE;

  /*
   *  Configure attribute 1.
   *
   *  rotationIndex refers to the loation of affine transformation matrix. We
   *  set it to a location computed with a macro. OBJSIZE_64, in our case
   *  since we are making a square sprite, creates a 64x64 sprite.
   */
  shuttle->x =
      SCREEN_WIDTH / 2 - shuttleInfo->width * 2 + shuttleInfo->width / 2;
  shuttle->rotationIndex = shuttleInfo->oamId;
  shuttle->size = OBJSIZE_64;

  /*
   *  Configure attribute 2.
   *
   *  Configure which tiles the sprite will use, which priority layer it will
   *  be placed onto, which palette the sprite should use, and whether or not
   *  to show the sprite.
   */
  shuttle->gfxIndex = nextAvailableTileIdx;
  nextAvailableTileIdx += orangeShuttleTilesLen / BYTES_PER_16_COLOR_TILE;
  shuttle->priority = OBJPRIORITY_0;
  shuttle->palette = shuttleInfo->oamId;

  /* Rotate the sprite */
  rotateSprite(&oam->matrixBuffer[shuttleInfo->oamId], shuttleInfo->angle);

  /*************************************************************************/

  /* Create the moon sprite. */
  static const int MOON_OAM_ID = 1;
  assert(MOON_OAM_ID < SPRITE_COUNT);
  SpriteInfo *moonInfo = &spriteInfo[MOON_OAM_ID];
  SpriteEntry *moon = &oam->oamBuffer[MOON_OAM_ID];

  /* Initialize moonInfo */
  moonInfo->oamId = MOON_OAM_ID;
  moonInfo->width = 32;
  moonInfo->height = 32;
  moonInfo->angle = 462;
  moonInfo->entry = moon;

  /*
   *  Configure attribute 0.
   *
   *  OBJCOLOR_16 will make a 16-color sprite. We won't specify that we want
   *  an affine sprite here because we don't want one this time.
   */
  moon->y = SCREEN_WIDTH / 2 + moonInfo->height / 2;
  moon->isRotateScale = false;
  /* This assert is a check to see a matrix is available to store the affine
   * transformation matrix for this sprite. Of course, you don't have to have
   * the matrix id match the affine id, but if you do make them match, this
   * assert can be helpful. */
  assert(!moon->isRotateScale || (moonInfo->oamId < MATRIX_COUNT));
  moon->isHidden = false;
  moon->blendMode = OBJMODE_NORMAL;
  moon->isMosaic = false;
  moon->colorMode = OBJCOLOR_16;
  moon->shape = OBJSHAPE_SQUARE;

  /*
   * Configure attribute 1.
   *
   * OBJSIZE_32 will create a sprite of size 32x32, since we are making a
   * square sprite. Since we are using a non-affine sprite, attribute 1
   * doesn't have an rotationIndex anymore. Instead, it has the ability to
   * flip the sprite vertically or horizontally.
   */
  moon->x = SCREEN_WIDTH / 2 + moonInfo->width + moonInfo->width / 2;
  moon->hFlip = false;
  moon->vFlip = false;
  moon->size = OBJSIZE_32;

  /*
   *  Configure attribute 2.
   *
   *  Configure which tiles the sprite will use, which priority layer it will
   *  be placed onto, which palette the sprite should use, and whether or not
   *  to show the sprite.
   */
  moon->gfxIndex = nextAvailableTileIdx;
  nextAvailableTileIdx += moonTilesLen / BYTES_PER_16_COLOR_TILE;
  moon->priority = OBJPRIORITY_2;
  moon->palette = moonInfo->oamId;

  /*************************************************************************/

  /* Copy over the sprite palettes */
  dmaCopyHalfWords(SPRITE_DMA_CHANNEL, orangeShuttlePal,
                   &SPRITE_PALETTE[shuttleInfo->oamId * COLORS_PER_PALETTE],
                   orangeShuttlePalLen);
  dmaCopyHalfWords(SPRITE_DMA_CHANNEL, moonPal,
                   &SPRITE_PALETTE[moonInfo->oamId * COLORS_PER_PALETTE],
                   moonPalLen);

  /* Copy the sprite graphics to sprite graphics memory */
  dmaCopyHalfWords(SPRITE_DMA_CHANNEL, orangeShuttleTiles,
                   &SPRITE_GFX[shuttle->gfxIndex * OFFSET_MULTIPLIER],
                   orangeShuttleTilesLen);
  dmaCopyHalfWords(SPRITE_DMA_CHANNEL, moonTiles,
                   &SPRITE_GFX[moon->gfxIndex * OFFSET_MULTIPLIER],
                   moonTilesLen);
}
What are assertions?
In the above code, you'll find some things that look like function calls to a
function called assert(). These aren't actually function calls, but macro
expansions. You'll have to include assert.h in order to use them.
#include <assert.h>
The assert macro allows the programmer to make assumptions about what is going on in the code. To use them, you just place some kind of "fact" in between the parenthesis. Whenever this assumption fails, the program will quit. Assertions are evaluated at run time.
Assertions help you avoid developing obscure bugs later on since they'll stop them right where something first goes wrong. Assertions are a good thing and should be used often.
When you release a production version of your software, the assertions can be
removed from your code by the preprocessor. To do this with a GNU compiler,
like the ones we are using, you simply set NDEBUG.
Remember to never use assertions for errors that end-users of your program could see in production. Assertions are best used for errors that occur due to programmer mistakes, not user mistakes (especially since users can't do anything about them, nor see how they occurred). For fatal errors that can happen in production, it's best to display a readable error message to the user.
For example, it is great to assert programmer assumptions, like one define
having a value bigger than the size of a particular struct. Because these are
all all evaluated at compile time, it's impossible that this changes after the
code has been compiled, and thus impossible that an user of your program will
ever find a problem that you haven't seen during testing.
Furthermore, you should never check that malloc() or fopen() return a valid
pointer with assert() because it's not guaranteed that they will always
succeed under ordinary conditions. If only use assumptions to check for these
kinds of errors and you had removed assumptions before production by setting
NDEBUG, you would miss handling these errors in production. For example, it's
possible that your game runs out of RAM because the user plays in a different
way than you during your tests, or that a file can't be found because the SD
card of the user is faulty. Your code needs to be able to handle these kinds of
run-time failures.
Displaying the Sprites
In our main function, we now need to initialize our copy of the OAM, create the
structs which hold our sprite data, make a call to the initSprites() function
we just created, and then update the OAM by copying our OAM copy to OAM.
int main() {
  /*  Turn on the 2D graphics core. */
  powerOn(POWER_ALL_2D);

  /*
   *  Configure the VRAM and background control registers.
   *
   *  Place the main screen on the bottom physical screen. Then arrange the
   *  VRAM banks. Next, confiure the background control registers.
   */
  lcdMainOnBottom();
  initVideo();
  initBackgrounds();

  /* Set up a few sprites. */
  SpriteInfo spriteInfo[SPRITE_COUNT];
  OAMTable *oam = new OAMTable();
  iniOAMTable(oam);
  initSprites(oam, spriteInfo);

  /* Display the backgrounds. */
  displayStarField();
  displayPlanet();
  displaySplash();

  /*
   *  Update the OAM.
   *
   *  We have to copy our copy of OAM data into the actual
   *  OAM during VBlank (writes to it are locked during
   *  other times).
   */
  swiWaitForVBlank();
  updateOAM(oam);

  /* Loop forever so that the Nintendo DS doesn't reboot upon program
   * completion. */
  for (;;)
    ;

  return 0;
}
Compiling
Before you get to compiling, you may want to look at the top of your main.cpp
file and verify that you are including all the proper files. There are a lot of
files to include now, so it is easy to lose track of which ones we need. (I
probably even forgot to let you know about some of them.)
#include <nds.h>
#include <assert.h>
#include "sprites.h"

/* Backgrounds */
#include "planet.h"
#include "splash.h"
#include "starField.h"
/* Sprites */
#include <assert.h>

#include "moon.h"
#include "orangeShuttle.h"
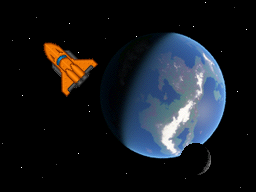
If all goes well, you’ll compile with no problems and the output will look as in Figure 5.3, “Output with both backgrounds and a sprite”.
Figure 5.3. Output with both backgrounds and a sprite