Chapter 4
How do I display a background?
Some Background Information
Since the beginning of time, humans have used raster displays to draw electronic images. Raster images aren't used too much anymore, in practice. However, most all displays still act like raster displays from a programming perspective. Each physical display on the Nintendo DS is actually an LCD screen which works nothing like a raster display in actuality, but the electronics that control it provide an interface to the graphics engines on the Nintendo DS that is very much like a raster display.
So what is a raster display? Put simply, it is just like a television display. A beam of electrons blasts away at the back of a phosphor coated screen in a deterministic way (known as a raster scan). The beam, from the perspective of a person watching the television, travels from left to right, one scan line at a time. The beam never blast electrons from right to left. After the beam reaches the right edge of the screen, it turns off and moves to the left edge and down one line. When the beam finally reaches the bottom line of the screen, it travels back up to the upper left of the screen and begins this drawing process all over again. Figure 4.1, “The Raster Display” illustrates this process in an exaggerated fashion.
Two things are important to remember here. First, that the period of time during which the beam goes from right to left (not drawing anything) is called the horizontal blanking period, or HBlank. Second, that the period of time during which the beam goes from bottom to top (again, not drawing anything) is called the vertical blanking period, or VBlank. Knowing about VBlank is useful for us as Nintendo DS programmers because it is the period of time in which we will tell the Nintendo DS to draw things. If we didn't, then the Nintendo DS display might be in the middle of drawing the screen when we tell it what to draw. This would give us strange artifacts and is generally undesirable.
Figure 4.1, “The Raster Display”

The 2D Graphics Engines
The Nintendo DS has two screens. As such, it has two graphics engines, one for each screen. The first engine is referred to as the "main" engine, while the second is called the "sub" engine. Both of these engines can put in charge of either screen. By default, libnds tells the main engine to operate the top physical screen and the sub screen the bottom physical screen.
Each engine supports up to four backgrounds and up to 128 sprites. They operate independently of each other, each with their own control registers, backgrounds, sprites, graphics data, and palettes. To use an engine, we must first turn them on. Then we place the engine into a certain mode of operation. Next, we map memory for use with the engines. Finally, we load their memory with graphics data and palettes and they automatically just draw what we've set them up to do.
The Fifth Mode
Each of these graphics engines can be placed into one of seven different modes that support different features. In this manual, we'll cover one of the more common graphic modes, Mode 5. It is commonly used because it is very flexible and allows for some amazing special effects. We'll learn how to display multiple 15-bit color 1-bit alpha affine1 backgrounds in this chapter. Mode 5 consists of four different backgrounds each with their own capabilities. Table 4.1, “Mode 5 Information” shows how flexible Mode 5 can be.
Table 4.1, “Mode 5 Information”
| Background | Purpose |
|---|---|
| 0 | Tiled Mode, 2D with 3D support |
| 1 | Tiled Mode, 2D |
| 2 | Extended Rotation Background |
| 3 | Extended Rotation Background |
A Fine Affine Background
An affine background, also known as an external rotation background or "exrot" background, is one that has the ability to be transformed by an affine transformation matrix2. Since linear algebra is beyond the scope of this manual, I will cover briefly how to set up a basic affine background, but not get into rotating, scaling, or sheering it. For this manual, we'll just apply an identity transform, a transform that doesn't actually change the background, to our backgrounds. With an affine transformation matrix, you can rotate, scale, and sheer an affine background, among other interesting effects. If you want to learn about the cool effects you can do with an affine background and an affine transformation matrix, I recommend you look at Cearn's tutorial on affine transformations at https://gbadev.net/tonc/affine.html.
Coding with this Manual
Since this is the first time in this manual where we'll start to write code, we
should be aware of the resources available to assist us in following along with
this manual. If you haven't already done so, download the sources that
accompany this manual from the manual homepage at http://patater.com/manual.
After extracting the sources, you'll find a folder called code. The manual
provides a template for you to use with this manual and any other Nintendo DS
programming projects you might wish to start developing. This template is
located in the code folder and is itself a folder called
chapter_0-starting_system. The code folder also contains project folders
for each chapter. If at anytime you get stuck or if you want to skip a chapter,
feel free to refer the completed project for the chapter you are stuck on or to
grab the completed project for the chapter prior to the one you wish to skip
to. To follow along with this manual, copy the chapter_0-starting_system
folder to a nice place you wish to work from (I'd copy the folder to my
~/projects directory and name the copy manual) and open source/main.cpp
with your favorite text editor. (My favorite text editor is vim.) Let's get
going!
Initializing the Hardware
In order to get the hardware to do what we want, we have to first initialize
it. This means turning on the 2D graphics core. This is where we first fall in
love with libnds. (We'll fall in love with it repeatedly over the course of
this manual.) libnds makes it incredibly simple to do these two things. Add the
following code to your new main.cpp C++ code file.
#include <nds.h>

int main() {
  /* Turn on the 2D graphics core. */
  powerOn(POWER_ALL_2D);

  /* Loop forever so that the Nintendo DS doesn't reboot upon program
   * completion. */
  for (;;)
    ;

  return 0;
}
Configuring the VRAM Banks
After we get the basic setup done, we now have to tell the graphics engine
where to get its display data from. The two graphics engines share the same
VRAM; i.e. There are not two VRAM A banks, one for the main screen and one for
the sub screen. We'll use these memory locations when we load the graphics
later. Let's make a function called initVideo().
void initVideo() {
  /*
   *  Map VRAM to display a background on the main and sub screens.
   *
   *  The vramSetPrimaryBanks function takes four arguments, one for each of
   *  the major VRAM banks. We can use it as shorthand for assigning values to
   *  each of the VRAM bank's control registers.
   *
   *  We map banks A and B to main screen background memory. This gives us
   *  256KB, which is a healthy amount for 16-bit graphics.
   *
   *  We map bank C to sub screen background memory.
   *
   *  We map bank D to LCD. This setting is generally used for when we aren't
   *  using a particular bank.
   */
  vramSetPrimaryBanks(VRAM_A_MAIN_BG_0x06000000, VRAM_B_MAIN_BG_0x06020000,
                      VRAM_C_SUB_BG_0x06200000, VRAM_D_LCD);

  /*  Set the video mode on the main screen. */
  videoSetMode(MODE_5_2D |           // Set the graphics mode to Mode 5
               DISPLAY_BG2_ACTIVE |  // Enable BG2 for display
               DISPLAY_BG3_ACTIVE);  // Enable BG3 for display

  /*  Set the video mode on the sub screen. */
  videoSetModeSub(MODE_5_2D |           // Set the graphics mode to Mode 5
                  DISPLAY_BG3_ACTIVE);  // Enable BG3 for display
}
There are nine VRAM banks in total on the Nintendo DS. See Table 4.2, “VRAM Bank Information” for details about them. Our 16-bit background images take up 128KB of memory each. Thus, each background has to have one whole VRAM bank assigned to it. Not all VRAM banks can be used for all purposes, however. Refer to Appendix A, for more detailed information.
Table 4.2. VRAM Bank Information
| VRAM Bank | Control Register Address | Control Register | VRAM Bank Size |
|---|---|---|---|
VRAM_A | 0x04000240 | VRAM_A_CR | 128KB |
VRAM_B | 0x04000241 | VRAM_B_CR | 128KB |
VRAM_C | 0x04000242 | VRAM_C_CR | 128KB |
VRAM_D | 0x04000243 | VRAM_D_CR | 128KB |
VRAM_E | 0x04000244 | VRAM_E_CR | 64KB |
VRAM_F | 0x04000245 | VRAM_F_CR | 16KB |
VRAM_G | 0x04000246 | VRAM_G_CR | 16KB |
VRAM_H | 0x04000248 | VRAM_H_CR | 32KB |
VRAM_I | 0x04000249 | VRAM_I_CR | 16KB |
Setting up the Affine Backgrounds
libnds helps us once again by provide a nice API3 for accessing the affine transformation matrix of a particular affine background. libnds provides access to a background's affine transformation matrix through four variables. Figure 4.2, “libnds Affine Background API” shows the names of these variables and which part of the affine transformation matrix they align with.
Figure 4.2. libnds Affine Background API
\begin{bmatrix}BG3{\text{_}}XDX & BG3{\text{_}}XDY\\BG3{\text{_}}YDX & BG3{\text{_}}YDY\end{bmatrix}
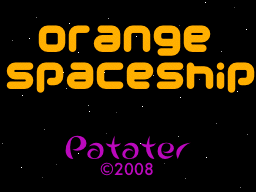
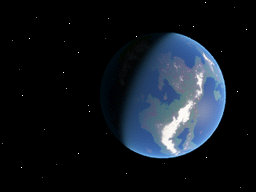
What we'll do now is add three backgrounds. We'll put a splash screen on the
top physical screen, a starfield on the bottom physical screen, and a planet
placed atop the starfield background. To do this, we'll use SUB_BG3 (although
we could use SUB_BG2) for the splash screen and both backgrounds 2 and 3 on
the main screen for the planet and starfield respectively. In order to make
sure the planet shows up above the starfield as opposed to below it, we give
the planet a priority number less than that of the starfield's priority number.
Relatively lower priority numbers place backgrounds relatively above other
backgrounds. There are only four priority numbers per graphics engine that we
can assign to backgrounds (priority numbers 0-3).
We'll now use that nice API libnds provides us for both the background control
registers and the affine transformation matrix. Let's proceed to make a
function called initBackgrounds() which will set up our affine backgrounds.
Explanations of what is going on is the comments.
void initBackgrounds() {
  /*  Set up affine background 3 on main as a 16-bit color background. */
  REG_BG3CNT = BG_BMP16_256x256 |
               BG_BMP_BASE(0) |  // The starting place in memory
               BG_PRIORITY(3);   // A low priority

  /*  Set the affine transformation matrix for the main screen background 3
   *  to be the identity matrix.
   */
  REG_BG3PA = 1 << 8;
  REG_BG3PB = 0;
  REG_BG3PC = 0;
  REG_BG3PD = 1 << 8;

  /*  Place main screen background 3 at the origin (upper left of the
   *  screen).
   */
  REG_BG3X = 0;
  REG_BG3Y = 0;

  /*  Set up affine background 2 on main as a 16-bit color background. */
  REG_BG2CNT = BG_BMP16_128x128 |
               BG_BMP_BASE(8) |  // The starting place in memory
               BG_PRIORITY(2);   // A higher priority

  /*  Set the affine transformation matrix for the main screen background 3
   *  to be the identity matrix.
   */
  REG_BG2PA = 1 << 8;
  REG_BG2PB = 0;
  REG_BG2PC = 0;
  REG_BG2PD = 1 << 8;

  /*  Place main screen background 2 in an interesting place. */
  REG_BG2X = -(SCREEN_WIDTH / 2 - 32) << 8;
  REG_BG2Y = -32 << 8;

  /*  Set up affine background 3 on the sub screen as a 16-bit color
   *  background.
   */
  REG_BG3CNT_SUB = BG_BMP16_256x256 |
                   BG_BMP_BASE(0) |  // The starting place in memory
                   BG_PRIORITY(3);   // A low priority

  /*  Set the affine transformation matrix for the sub screen background 3
   *  to be the identity matrix.
   */
  REG_BG3PA_SUB = 1 << 8;
  REG_BG3PB_SUB = 0;
  REG_BG3PC_SUB = 0;
  REG_BG3PD_SUB = 1 << 8;

  /*
   *  Place main screen background 3 at the origin (upper left of the screen)
   */
  REG_BG3X_SUB = 0;
  REG_BG3Y_SUB = 0;
}
Fixed Point Number Primer
What's up with all those << 8 thingies? Those are fixed point numbers. The
Nintendo DS expects many values to be in varying fixed point formats. A fixed
point number is simply a way of specifying multiples of fractions to represent
non-integer values. For example, if we use an integer variable to store a US
Dollar amount, we might initially think we can only represent whole dollar
values. However, if we decide to store US pennies in the integer as opposed to
whole dollar values, we can all of a sudden represent fractions of US Dollars
with our integer. We can have 1.21 US Dollars by saying we have 121 pennies.
Common notation for fixed point types looks like 1.31, 1.7.24, 8.8, and etc. To interpret this notation, we read from right to left. First, we find the number of bits used to specify fractional parts. The next number will be the number of bits for whole number parts. And, if there is another number, it will usually indicate the sign of the number as being either positive or negative with one bit. Figure 4.3, “Integer variables can be used to represent fractions.” illustrates the concept of fixed point numbers.
Figure 4.3. Integer variables can be used to represent fractions.
Bits Positions:
\[ 15{\text{ }}14{\text{ }}13{\text{ }}12{\text{ }} 11{\text{ }}10{\text{ }}9{\text{ }}8{\text{ }}7{\text{ }}6{\text{ }}5{\text{ }}4{\text{ }}3{\text{ }}2{\text{ }}1{\text{ }}0 \]
Normal Interpretation:
\[ 2^{15} + 2^{14} + 2^{13} + 2^{12} + 2^{11} + 2^{10} + 2^{9} + 2^{8} + 2^{7} + 2^{6} + 2^{5} + 2^{4} + 2^{3} + 2^{2} + 2^{1} + 2^{0} \]
Fixed Point (8.8) Interpretation:
\[ 2^{7} + 2^{6} + 2^{5} + 2^{4} + 2^{3} + 2^{2} + 2^{1} + 2^{0} + 2^{-1} + 2^{-2} + 2^{-3} + 2^{-4} + 2^{-5} + 2^{-6} + 2^{-7} + 2^{-8} \]
The Basics of DMA
DMA stands for Direct Memory Access. DMA allows the reading and writing of memory independently of the CPU. The Nintendo DS has special, dedicated DMA hardware to do quick and moderately effcient moving of memory. DMA is not very efficient for memory fill operations, however, as the data to fill with needs to be read once for every write. Libnds provides us with a few functions to make use of the DMA hardware in the Nintendo DS.
Copying data is a complex topic. Sometimes it isn't easy to decide whether to do copies with the CPU or DMA.
CPU copies can be done with standard C library functions like memcpy() or
memmove(), with Nintendo DS BIOS functions like swiFastCopy(), or with your
own custom functions. They don't block the CPU itself, and they can be
interrupted by hardware interrupts. This is very important if your game requires
fast handling of interrupts. Sometimes you just can't wait until a DMA copy is
finished because it will be too late to handle your interrupt.
DMA copies can be faster, though. If the source and destination memory regions are different (like copying data from main RAM to VRAM) it's usually faster than doing a CPU copy. However, remember that this will block interrupts until the copy is done! It may be a good idea to limit DMA copies to small things. When using DMA to copy from main memory, do not forget to flush main memory before using DMA. The DMA doesn't use the cache where the relevant memory may currently be stored, so flushing to main memory guarantees that DMA sees the correct data.
Something very important to consider is the cache of the ARM9. This CPU (the one you normally write code for) has an intermediate fast scratch RAM between the CPU and the main RAM. This is critical to ensure that the performance is reasonable (disabling the cache will have a dramatic effect in any program). The main problem is that the only device that can see the cache is the ARM9 itself. Whenever you copy data from one place to the other with the CPU, the CPU may store data in the cache for faster future access. However, if you're trying to copy that data to VRAM, for example, it means that VRAM may never actually contain what you want it to contain. In order to force the cache to update the destination, you need to "flush" the cache.
Cearn has written two great articles about this topic:
https://web.archive.org/web/20210622053504/https://www.coranac.com/2009/05/dma-vs-arm9-fight/
https://web.archive.org/web/20210622053550/https://www.coranac.com/2010/03/dma-vs-arm9-round-2/
When using the CPU to copy from main memory, do not forget to flush the destination memory after the copy. This will ensure that the destination memory contains what you want it to contain.
When using DMA to copy from main memory, do not forget to flush main memory before using DMA. The DMA doesn't use the cache where the relevant memory may currently be stored, so flushing to main memory guarantees that DMA sees the correct source data to be copied. You don't need to flush the destination in this case.
The declaration of dmaCopyHalfWords() from libnds is as follows.
static inline void
dmaCopyHalfWords(
    uint8 channel,
    const void *source,
    void *dest,
    uint32 size
);
In our program, we will use dmaCopyHalfWords() to load some graphics into
memory. We use the function dmaCopyHalfWords() instead of dmaCopy() because
it is more explicit as to how it is copying and it lets us specify which DMA
channel to use when copying. We'll use the same channel (channel 3) that the
ordinary dmaCopy() uses, though.
Let's start out by writing some functions to display our backgrounds. Since we've already set up the hardware to display the data in the desired manner, right after the copy we will get some nice images displayed on our screens. If we didn't set up our backgrounds first, we'd most likely get garbage on the screen until we eventually did set up the background control registers.
/* Select a low priority DMA channel to perform our background copying. */
static const int DMA_CHANNEL = 3;

void displayStarField() {
  dmaCopyHalfWords(DMA_CHANNEL, starFieldBitmap, /* This variable is generated
                                                  * for us by grit. */
                   (uint16 *)BG_BMP_RAM(0),      /* Our address for main
                                                  * background 3 */
                   starFieldBitmapLen); /* This length (in bytes) is generated
                                         * from grit. */
}

void displayPlanet() {
  dmaCopyHalfWords(DMA_CHANNEL, planetBitmap, /* This variable is generated for
                                               * us by grit. */
                   (uint16 *)BG_BMP_RAM(8),   /* Our address for main
                                               * background 2 */
                   planetBitmapLen); /* This length (in bytes) is generated
                                      * from grit. */
}

void displaySplash() {
  dmaCopyHalfWords(DMA_CHANNEL, splashBitmap, /* This variable is generated for
                                               * us by grit. */
                   (uint16 *)BG_BMP_RAM_SUB(0), /* Our address for sub
                                                 * background 3 */
                   splashBitmapLen); /* This length (in bytes) is generated
                                      * from grit. */
}
Working with the Makefile
The default template makefile will turn your graphic files into object files for linking into your program. Never include data as a header file.
The graphics must be in a lossless image format, such as gif, tif, bmp, or png
in order to work with the provided template makefile. I prefer the png graphic
format. Image conversion is usually done by a program called grit. The
provided template makefile will ask grit to convert images in the gfx
folder of your project root to a format ready for the Nintendo DS.
The provided template makefile, adapted from the default libnds template
makefile, is a good base for most all projects. It will look in a folder called
gfx (in the same directory as the makefile) for your graphics. If any are
found, it uses a special bin2o rule to tell grit to turn your images into .o
files, according to grit rule files (with the .grit files extension), which
can be linked into your program. grit will create a header file (.h) for your
data. The name format for them works like so: if a file is called
orangeShuttle.png the header file will be called orangeShuttle.h. Inside
this header file will be a reference to the data in the .o, named
orangeShuttleTiles and orangeShuttlePal or orangeShuttleBitmap, depending
on how the grit file specifies which format to convert your image into. It will
also include the length in bytes of the data references as
orangeShuttleTilesLen and orangeShuttlePalLen or orangeShuttleBitmapLen.
For our project, we'll be putting the our graphic files and grit rule files
into the gfx directory and having the makefile use grit on them.
Gritty Crash Course
With the emergence of the awesome and multi-platform tool, grit there is no
reason to not learn how to use it. It is now a standard tool in Nintendo DS and
GBA development where afore to there was no universal method of image
conversion.
To use grit, we make a grit rule file. This file has the .grit file extension
an contains important information telling grit how we want our image converted.
You can learn about how grit works by reading its built-in help by running the
command grit with no parameters. I've also provided commented grit rule files
for all images we will use in this manual. These make good examples and can
help you get the hang of using grit.
For more information regarding grit, you can visit the project homepage and read the grit manual at http://www.coranac.com/projects/grit/ and http://www.coranac.com/man/grit/html/grit.htm respectively. You can also download the latest version of grit from the grit project homepage.
Putting in the Star Fields
Let's now put these functions into our main() function to get everything
working together.
#include <nds.h>

#include "planet.h"
#include "splash.h"
#include "starField.h"

/* Other functions we've made are here. */
int main() {
  /*  Turn on the 2D graphics core. */
  powerOn(POWER_ALL_2D);

  /*  Configure the VRAM and background control registers. */
  lcdMainOnBottom();  // Place the main screen on the bottom physical screen
  initVideo();
  initBackgrounds();

  /*  Display the backgrounds. */
  displayStarField();
  displayPlanet();
  displaySplash();

  /* Loop forever so that the Nintendo DS doesn't reboot upon program
   * completion. */
  for (;;)
    ;

  return 0;
}
Compiling
Check over your code, referring to the included examples if needed. Make sure
you have the graphics files and the grit rule files in the gfx directory in
your project directory. Bring up the command line and set your current working
directory to the directory which contains the makefile for your project. Type
make and if all goes well, you'll have good success.
See Figure 4.4, “The program should look like this when run.”. Copy your program to your DS using the method you have chosen.
Figure 4.4. The program should look like this when run.
Affine
Affine transformation matrix
Application programming interface